Showing posts with label Tech Tips. Show all posts

Tuesday, June 23, 2026

How to Switch Between Online and Offline Modes in Thunderbird

One of the advantages of using a desktop email client is being able to go offline, over just accessing our email over the web. Being able to disconnect and purposely being offline for focus work, or when it is necessary due to unavailability or poor access to the internet, is one of the benefits of using an application like Thunderbird.

Below is a quick guide on how to toggle between online and offline modes in Thunderbird.

Switching Between Online and Offline Modes in Thunderbird

There are two methods to toggle or switch between online and offline modes.

Interface Method

  1. At the bottom left of Thunderbird, look for the "Signal" icon. Clicking on the icon will toggle Thunderbird between Online and Offline modes.

  2. If this is the first time that you are going offline, then the Signal icon would show an online status ( as shown in the image below ).


  3. Click on the "Signal" icon to go Offline.

  4. There will be a dialog box asking if you would like to download your emails before going offline. If you would like your emails to be available once you go offline, click on the button "Download Now".


  5. You will see the download / sync progress on the bottom right of Thunderbird.

  6. Once downloading is complete, the "Signal" icon will be grayed out and will have a slash in the middle to icon, meaning Thunderbird is now in offline mode.


Menu App Method

  1. First, if you are unable to see the menu bar which should be below the search bar at the top of the application, you can press ALT to temporarily reveal the Application Menu bar.

  2. If you are still unable to see the menu bar, you can enable it by clicking on the "hamburger" icon ( three horizontal lines ) on the top right of the app near the "Minimize" and "Close" buttons. Navigate to View > Toolbars and click to enable "Menu Bar".


  3. From the Main Application Menu, navigate to File > Offline and you can toggle "Work Offline" from there.


Wednesday, June 17, 2026

Show File Name Extensions in Windows 11 File Explorer

By default, and as a consistent design decision going back to previous versions, the Windows 11 File Explorer hides file name extensions. Though it simplifies the interaction between a casual user and provides a cleaner user interface, there are advantages and most would like to have file name extensions to be shown. Being able to verify actual file name extensions gives users better recognition and control over their files, from being able to quickly spot disguised executables ( e.g. invitation.pdf.exe ) and avoid malicious software being run or installed on their machines, to having better control when working with different types of files, like when viewing files that have similar or the same names ( e.g. image.jpg and image.png ). Visual cues like icons are not as reliable as actually knowing the file name extensions of the files that we manage and work with.

Below are 2 ways to enable file name extensions to be shown in Windows 11 File Explorer.

View options in File Explorer ( Quickest Method )

  1. Open File Explorer ( Windows Key + E )
  2. On the toolbar, click on View -> Show -> File Name Extensions. File Name Extensions should have a checkmark after being selected or clicked.
  3. Filename extensions should now be displayed and shown in File Explorer.

Folder Options ( Traditional Method )

  1. Open File Explorer ( Windows Key + E )
  2. Click the three-dot menu and select Options
  3. In the Folder Options dialog, open the View tab
  4. Under Advanced settings, look for and uncheck the setting for Hide extension for known file types.
  5. Click Apply and then OK.

Sunday, July 21, 2024

Backup GMail to Thunderbird ( IMAP )

  1. Download and install Thunderbird.
  2. Run Thunderbird.
  3. Provide email address and password during automatic configuration.
  4. Allow access to GMail when prompted by Google.
  5. Allow Thunderbird to do initial synchronization. Default setting of Thunderbird is to download for all folders.
  6. Go offline and proceed with the prompt to download messages for offline use. Download progress should be displayed at the bottom of the Thunderbird window.
  7. Go to General Settings > Offline Settings. Turn off “Automatically follow detected online state” and under “Manual state when starting up”, select “Offline".


  8. Review messages in offline state to check if all messages have been downloaded.

Optionally, if the backup is for archiving an offline copy that will be stored in an external storage, you can download Portable Thunderbird, and use the same steps above for backing up your email.

Monday, February 15, 2016

Disable Adaptive Brightness on Windows 8, 8.1 and 10

If you have a newer laptop running Windows 8, 8.1 and 10, you probably have noticed your screen automatically adjusting brightness when switching applications that have light to dark backgrounds, or when working in different lighting conditions. This is due to a feature that makes use of the ambient light sensors on your laptop to automatically adjust your screen's brightness level - aptly named Adaptive Brightness. This can be useful for conserving battery life, but can be annoying when you are trying to focus, read or work.

Disable Adaptive Brightness ( I tested this on Windows 8.1, but should work on both 8 and 10 )

  1. Open the Windows Control Panel ( Do Windows key + C on your keyboard to open the Windows Charms, click on Settings and select Control Panel ).
  2. From the Control Panel, navigate to Hardware and Sounds > Power Options.
  3. On your selected Power Plan, click on Change Plan Settings.
  4. Next, find and go to Change advanced power settings.
  5. On Power Options, look for Display and click on the plus sign to expand the available options.
  6. Expand Enable adaptive brightness and turn off for either On battery or plugged in, or turn off for both.
  7. Click on Apply to save changes.


Note: After doing the steps above, you may need to restart your PC for changes to take effect.


Saturday, April 12, 2014

Using .ico format in Photoshop

I usually would just use free online converters for generating favicons, but recently I just stumbled upon an old plugin that works from Photoshop 5.0 ( on Windows ) up to latest version. Just remember to download the correct plugin version and read the instructions for proper installation.

Link: ICO (Windows Icon) file format plugin for Photoshop

Tuesday, August 14, 2012

Changing from Dynamic to a Static Port for an SQL Server Named Instance

  1. Open SQL Server Configuration Manager

  2. Expand SQL Server Network Configuration

  3. Open ( Double-click ) on Protocols for

  4. If not enabled, change TCP/IP status to enabled ( Right-click and select Enable ). If already enabled, open TCP/IP ( Double-click )

  5. On TCP/IP Properties go to the IP Addresses, scroll down to IPAll. Change the value for TCP Dynamic Ports to blank, and the TCP port to the Static Port that is desired ( for example 1433 )

  6. Click Apply to make changes, and OK to close the window.

  7. Restart the SQL Server Services ( on SQL Server Configuration Manager, right click on SQL Server Services and click restart )

Note: Guide above is applicable to MS SQL Server 2008. Steps may vary depending on the version of MS SQL that you have.

Friday, June 15, 2012

Disable Avast! Antivirus Update Notification Sound and Popup


I've been using Avast! on my personal machine for a couple of years now, and even though I like being reminded that my Antivirus has been updated, there are times that I am focused on something and the sudden sound and popup reminder becomes a distraction.

Note: Instructions below are based on Avast! 7.

To disable sounds:
  1. Open Avast! by clicking on the Toolbar tray icon.
  2. Click on Settings near the top-right of the Avast! screen.


  3. On the left menu of the Basic Settings page, select Sounds and Uncheck Enable avast! sounds.


To disable update notifications:

  1. On the left menu of the Settings page, select Updates, Click on Details to show extra options, and uncheck Show notification box after automatic update.


To disable both sound and popup notifications ( Silent / Gaming Mode ):

  1. On the left menu, select Silent / Gaming Mode, Tick the checkbox for Silent / Gaming Mode.


Friday, February 24, 2012

What is that  on top of my web page?

 is the BOM or Byte Order Mark of the Unicode standard. To solve issues where the BOM appears on top of your web page, simply open it in a note editor like notepad++ and change formatting to Unicode in UTF-8 without BOM and then save the file.

The BOM should not appear anymore when you view the page on a browser after doing this formatting change.

Resources:

  1. Byte order mark ( Wikipedia )
  2. Notepad++ is an open source text editor. You can download notepad++ here.

Saturday, October 01, 2011

Problem opening Maxthon Portable

Maxthon is a browser that uses both the Trident ( IE ) and Gecko ( Firefox ) browser engines. This browser is available in a portable version, and this quick tip is about how to resolve an issue when opening Maxthon Portable, and it gives you an error saying "Another instance of Portable Maxthon is starting. Please wait for it to start before launching again" ( it should also apply to most cases when you receive an error upon starting the program ).

To resolve the issue, go to the Portable Maxthon folder > Data and look for a file named PortableApps.comLauncherRuntimeData-MaxthonPortable.ini. Delete this file ( don't worry, it will be recreated once Maxthon has successfully opened ) and then try to start Portable Maxthon.

Resources:

  1. Maxthon Site
  2. Maxthon Portable from PortableApps

Tuesday, July 12, 2011

Disable Speed Dial in Opera

Opera's Speed Dial feature offers a quick way to access sites that you regularly visit, but in some cases, like in mine, you may just prefer a blank page and the address bar when you open a new tab. To disable Speed Dial in Opera:

  1. In the Opera address bar, type in about:config or opera:config. This enables you to access Opera's Preferences Editor.

  2. On the Preferences Editor, under User Prefs, look for Speed Dial State. Set the value to 0 ( values: 0 - folded, 1 - normal view, 2 - Read Only and 3 - disabled ).

  3. Click Save under the User Prefs section for the setting change to take effect.

Tuesday, July 05, 2011

Video player for .dav files

Trying to view recorded CCTV footage, I had to find a player for playing the .dav format that the CCTV DVR system was recording to. I found 2, the first one was able to open the file but did not properly display the video while the second one actually was able to play it. If you are trying to open a .dvr file, you can also try using any of these 2 and see if it works for you.

  1. DVR365 Player
  2. Mace SQ and HQ File Player

Wednesday, June 29, 2011

Stop Simplenews from sending out a newsletter ( Drupal )

This tip is for people using Drupal and a module called Simplenews for maintaining and sending out newsletters to an email list.

There might come a time when you need to stop simplenews from sending newsletters - maybe because of issues with the module or the Drupal site, or you accidentally sent the wrong newsletter to a certain list of users. Whatever the reason, below is a quick way of stopping Simplenews.

  1. Backup your database first. You can use a module called Backup and Migrate to do so.

  2. Open phpMyAdmin, and look for under your Drupal site's database the simplenews_newsletter table.

  3. Determine the node id of the newsletter you are sending ( going into the edit page would show you the node id on the url ). Look for that node id on the simplenews_newsletter table, and click on the edit button on the left of the row ( pencil icon ).

  4. Change the s_status from 1 ( which means sending ) to either 0 ( unsent ) or 2 ( sent ).

  5. Empty the simplenews_mail_spool table ( this is where all the email addresses and status per message is stored ).

    You can use TRUNCATE to do this, as in the code below:

    TRUNCATE TABLE simplenews_mail_spool

Monday, May 30, 2011

Creating a database in iWeb's PanelBox

iWeb is a Canadian web hosting company that offers shared hosting, managed and unmanaged dedicated servers and colocation.

What is PanelBox?

PanelBox is custom cPanel interface used by iWeb for its hosting accounts.

Creating a database

  1. To create a database in PanelBox, first login to your account. The default url would be /cpanel.

  2. Under General Options, click on Database.

  3. Select whatever Database you want to setup > either MySQL or PostgreSQL. For this guide, we'll be using MySQL.

  4. Name your database and click on "Create Database".

    New Database

  5. Now you need to create a user for the database you just created. Hover again over MySQL, and select "Add new user".

  6. Name the user, and give a strong password. Click "Create User" to proceed creating a new database user.

    New User

  7. Next step is to add the user you created to the database, hover over MySQL and select "Add User To Database".

  8. On the Add User To Database page, select the user and database you created and hit "Submit".

  9. Manage User Privileges page should appear next, check "All Privileges" and then click on "Make Changes".

Now that you have setup the database, you should be able see it under MySQL > Current Databases.

Tuesday, March 08, 2011

Lightroom automatically opens when USB drive / Memory Card is inserted

Just a quick tip to stop Lightroom ( in this case 3.2 ) from automatically opening when inserting a USB drive / Memory Card.


  1. Open Lightroom, from the main top menu, select Edit > Preferences.
  2. Under the General Tab, look for Import Options.
  3. Uncheck "Show import dialog when a memory card is detected". Click OK to save the setting change.

Sunday, April 02, 2006

Adding your most used folders to the Send To menu

Folders are the standards by which we categorize or group our files (I mean offline), and in my case, I have so many folders hidden inside main folders, hidden inside different partitions. Both for work or for personal use, using the Send To menu (of course accessible through the right-click of the mouse) is very useful because you can directly point files towards commonly used folders instead of going through the Windows Explorer and using the copy/cut-paste method to organize files. Here's a quick walkthrough to get your Send To menu as first option to transfer files:

  1. Look for the folder you want to include in the Send To menu. Right click on the folder and click on Send To and then Desktop(create shortcut). Now you have a shortcut on the desktop.
  2. Open My Computer and access the drive where you have your Windows installed. (most probably C:)
  3. Open the Documents and Settings folder and open the folder corresponding to your username.
  4. Open the Send To folder, where you can find the items that you see when you try to use the Send To menu. If you can't find this folder, then you need to go into Tools > Folder Options > View > Hidden Files and Folders > select Show hidden files and folders.
  5. Now, cut the shortcut that you've made on the desktop, and paste it inside the Send To folder.
  6. Do the same with whatever folder you want to include to the Send To menu.

Thursday, February 09, 2006

HOW-TOs and Tips : Windows Media Player 10

If you're using Windows XP, and want to upgrade to Windows Media Player 10 click here.

Adding Lyrics to Audio Tracks

Make it easier for you to sing-along with your favorite songs by including the lyrics to the tracks itself. Here's how:

  1. By default, WMP 10 will add to the its Library all the songs played from the local drive. Look inside the "Library" on the main WMP window for the song you want to put lyrics into.
  2. Now, if you have the lyrics already, open the file where you have it (.doc, .txt, .html, etc...) and copy the lyrics. (Highlight lyrics, CTRL+C or right-click "Copy")
  3. Next is to right-click on the song and select " Advanced Tag Editor".
  4. Go to the "Lyrics" tab. Click "Add", select "Language" and paste the lyrics on the "Text" field. Click "Apply" after checking the lyrics.
    Tip: Click on the "Synchronized Lyrics...", you can add the lyrics as the song progresses, so that it appears synchronized when you play it.
  5. On the "Library" play the song and switch to (or click on) "Now Playing". This is where you should see the lyrics on the bottom of the player, you could also set visualizations, etc...
  6. If the lyrics does not appear, press on CTRL+SHIFT+C to enable captions. (Another way is through Play > Captions and Subtitles.)

Ripping CDs to MP3

WMP 10, unlike its predecessors, can directly rip cd tracks into mp3s. WMP 9 and lower requires a plug-in (which you needed to pay for) before being able to write mp3 files. The default wma format is still available and is the default encoder. To enable MP3 encoding, here's a quick walkthrough:

  1. Open "Tools", then "Options".
  2. On the Options window, click on the "Rip Music" tab.
  3. Here you will have the fields for changing the location to where you want to put the ripped files ("Rip music to this location"), format (where you can switch to WMA or MP3) and audio quality.
  4. Just change the field for "Format" to MP3. Edit location and audio quality as needed, also you might want to change "File Name..." to whatever is most appropriate. Click "Apply" to save changes.
  5. Now on the main WMP window, click on "Rip". Insert Audio CD that you want to copy to your local HDD.
  6. Most cds will display track info automatically. If it doesn't, just right-click on the first track and select "Edit". Now input track info and just tab to the next fields.
  7. By default, all the tracks are selected, uncheck those that you don't want to include.
  8. When you're done with checking and enumerating track info, simply click on "Rip Music" (upper right of the screen)

Burning to CDs

It's easier to burn or write to a CD with WMP 10, and there are different ways to do it. Here are some:

Create, Save and Burn a Playlist :

  1. Open your "Library" (as mentioned, WMP10 will automatically place songs you play from your local drive to the "Library").
  2. Drag and drop songs to the "Playing list"
  3. After finishing your list, click on the "Now Playing List" button.
  4. Select "Save Playlist As" to save your playlist (you can name it appropriately so that its easier to find and burn later)
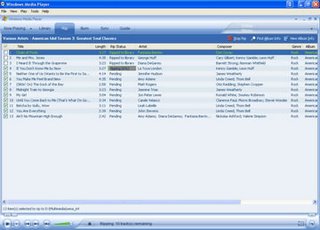
  5. After saving the playlist, Go to the "Burn" Menu Tab.
  6. This window is divided into two, on the left side is a drop-down menu where you can choose playlists, favorites, albums, artists etc. Locate your just created playlist here.

  7. Tip : You can burn straight from a generated "favorites" list. Just choose a favorite like "Favorites - Listen to on Weekdays" (the list is auto-generated by WMP based on listening habits)
  8. Select the playlist. Selected songs should appear, and you have the option to uncheck those that you, at the last minute, would not want to include. On the right panel choose from the drop-down menu whether you would want to create an Audio CD, a DATA CD (mp3,wma format) or Highmat audio.
  9. Click on "Start Burn" for the burning process to begin.

Creating a Burn List :

If you don't want to save a playlist and just want to create a CD directly from the songs that you have on your Library, then :

  1. On the "Library" , highlight all the songs you want to burn. (HOLD on CTRL button and click to select tracks.)
  2. Once you've selected all the songs, right-click on the mouse (while still pointing to any song selected), and click on "Add to" then "Burn list".
  3. Now go to the "Burn" menu and the songs selected should now be on the list. You can uncheck unwanted tracks and also edit the destination CD type. Click "Start Burn" to begin the writing process.

Customizing WMP 10

Changing Skins

You can customize the look and feel of WMP by changing the skin (skin mode) of your player. By default there are a few that you can choose from (pre-installed), but to broaden your list of choices :

  1. Download a skin (.wmz file) from WMplugins (or google it to find other sites)
  2. Once the download completes, open the .wmz file and you should have an option to view it. If you choose "view", it will load the skin automatically.

  3. Tip : Use the keyboard shortcuts to switch from full mode to skin mode. Full Mode by CTRL+1 and Skin mode by CTRL+2.
  4. You can also manually choose skins by going into View > Skin Chooser. Just select the skin of your choice and click on "Apply Skin" afterwards (or ALT+A).
  5. Use CTRL+1(Full mode) and CTRL+2(Skin mode) to switch from the standard view to the skin mode view.

Changing Visualization

When you're playing audio, you can either have a visualization screen running or just a plain black window.

Tip: Disable visualization by going into View > Visualiztion > No Visualization If your audio file has album art, you can also choose that to have a static image displayed.

  1. Change visualization by clicking on View > Visualization and then selecting the one you want to try on.
  2. You can also download visualization from WMPlugins and go through the same process mentioned above.

Synchronize WMP 10 playlists with Removable Devices

Similar to burning a cd, the "Sync" option enables you to use pre-created playlists to synchronize what you're listening to on your desktop and what you're traveling with on a Portable Storage device. In my case, I've tried the synchronization process with a USB Flash drive.

  1. Connect Device and let Windows identify the device.
  2. Open Windows Media Player 10 and select "Sync" from the main menu. A pop-up box will ask if you want to do it automatically or manually.
  3. The connected device should be listed on the right side of the screen. Select a playlist or create a new one from the left pane. (WMP 10 will automatically check everything on the playlist unless there's not enough space)
  4. Click on "Start Sync" to initialize process. This will convert files on the playlist to wma and copy files listed on the playlist to the Portable device.
  5. WMP will put on the removable device an xml file so that the next time the same device is connected, the playlist being synchronized will be updated.

Useful Keyboard Shortcuts (for playback)

  • CTRL+P = (Play or Pause)
  • CTRL+S = (Stop)
  • F8 = (Mute)
  • F10 = (Increase Volume)
  • F9 = (Decrease Volume)
  • CTRL+B = (Play previous)
  • CTRL+F = (Play next)
  • CTRL+1 = (Full mode)
  • CTRL+2 = (Skin mode)

More Keyboard shortcuts

Saturday, February 04, 2006

HOW-TOs and TIPS: XMPlay

Changing Skins for XMPlay:

  1. Choose and download skins from the site. (The skins should be on the same page where the XMPlay download is located.)
  2. Once the download is completed, you should have an .xmpskin file. Cut and paste this file to the same directory where you extracted the XMPlay files.
  3. Open XMPlay, Click "Options and stuff".
  4. Under "Device" should be the entry for "Plugins and skins". Click on this entry.
  5. Change the field for "Current Skin" to the one you've chosen and downloaded.

Enable MP3 encoding

  1. Download LAME and extract lame.exe to the same directory where XMPlay is found.
  2. Open "Options and Stuff" , Locate “Device” > “Encoders”.
  3. On the "Encoder" field, scroll and select "LAME".
  4. Go back to "Device" and look under the "Output" category where you will find the field entry for device. Scroll and change to "Encoder - LAME". You can also play around with the settings for the writing process, as you can change the fields for buffering, channels, sample rate, etc.
  5. Under File writing click on browse and select where you want to write the files to. Click on apply to save changes.
  6. Now you can either encode streaming media or cd tracks. When you click on Play, it will ask you for a file name, after which it starts encoding.

If you want to go back to listening, change back the "Device" field to your soundcard.

Setting XMPlay as your default Audio Player (for supported formats) :

  1. On the "Options and Stuff" window, select "Integration".
  2. Under "Associated file types", select the formats you want XMPlay to open. Select all if you want to play all the supported files through XMPlay.
  3. You can also set other options in here, and even add Desktop and Quick launch icons.
  4. Click apply and changes should take place automatically.

Tip : Once you've set XMPlay as your default player, you might want to change how files open in XMPlay. Open "Options and Stuff" and go to "Miscellaneous". On this page, look for and uncheck "multiple instances" as this forces XMPlay to open a separate instance for each music file opened (excluding those dragged n'dropped).

Creating Playlists

Having playlists enables XMPlay to load a group of songs in one instance of XMPlay, and is also useful if you're using XMPlay with a Portable storage device.

  1. Create one by just selecting/opening the songs you want to include. Click on the floppy disk drive image(default skin) which is the "save list" button. Give it a name and save it on the same directory as XMPlay so its easier to retrieve.
  2. You can retrieve the playlist by just opening the .pls file you've created.

Tip : As mentioned, playlists are helpful most especially if you're using different computers and store songs on each of them. Save your playlists together with the XMPlay files on your portable storage device and probably name your playlists according to location (eg: lab.pls , class19.pls , etc.).

Tuesday, January 31, 2006

Don’t display last user name (previous user logged on) for Windows XP

When one is using the classic logon screen in Windows XP, the last user logged on is saved and appears on the user name field automatically. This is helpful, as all you need to do next is tab to the password field and input the password. The bad side is if you have a visitor or a co-worker who turns on the PC, that person would know an existing user account because the last user log-on would be displayed, and can guess for the password to gain access to that particular account.

There is an available registry edit that enables this particular information to be hidden. If you wish to do so, follow the steps outlined below:

  1. Access the registry editor by clicking on Start (Start menu button on the desktop), choose or click on Run and type on the input field : regedit. Select OK and the Registry Editor should appear.
  2. Go through the following path : HKEY_LOCAL_MACHINE > SOFTWARE > Microsoft > Windows > Current Version > policies > system. On the right pane, look for the entry : dontdisplaylastusername . (An easier way I guess is to open the Registry Editor, do Ctrl-F to open the Find window, and type in : dontdisplaylastusername )
  3. Double-click (or right click > modify) the entry dontdisplaylastusername, Input or type in 1 under Value Data. Click OK and exit Regedit.
  4. Log off and verify if the username is now blank.